Understanding how to wire a switch with two cables is a basic yet essential skill in the world of domestic electrical installations. Although it may seem a minor task, mastering it involves understanding the internal logic of control mechanisms, correctly identifying the conductors and avoiding mistakes that could compromise the safety or operation of the installation.
)
This type of switch, also known as a one-way switch or single-pole switch, is the most widely used in homes, offices and commercial premises, precisely because of its simplicity and effectiveness.
Before getting into the practical process, it is worth pausing for a moment to consider the context: not all control mechanisms work the same way or are wired the same way.
So, to avoid any confusion and make sure we are working with the right device, it is essential to tell apart one-way switch, two-way switch and intermediate switch mechanisms. This distinction, sometimes overlooked, is key to understanding why a two-wire switch is the right choice in some situations and not in others.
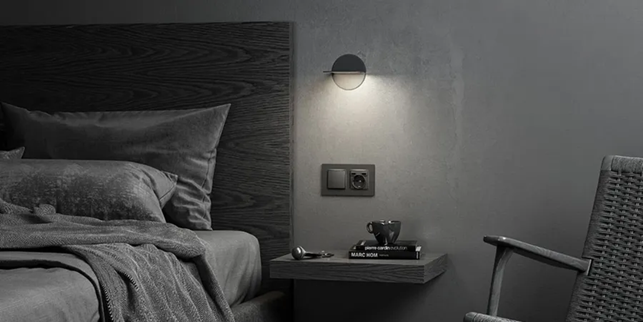
Types of control mechanisms: one-way switch, two-way switch and intermediate switch
Control mechanisms are the devices that allow you to control the lighting. Although their outer appearance may look similar, their inner workings and wiring are very different. Understanding these differences is the first step to working safely and accurately.
One-way or single-pole switch
It is the most basic mechanism and the star of this guide, standing out for:
Controlling a single light point from one location.
It uses only two wires: the incoming live and the outgoing live to the lamp.
It is the most common in homes and spaces where multiple-point control is not needed.
Its simplicity makes it the ideal mechanism for learning how to wire a switch with two cables without complications.
Two-way switch
The two-way switch lets you control the same light from two different points. Here are its main features:
It requires three cables.
It is installed in pairs: one switch at each control point.
It is common in long corridors, staircases or bedrooms with a switch at the entrance and another next to the bed.
Intermediate switch mechanism
It is a higher level of complexity, standing out for:
It lets you control a light from three or more locations.
It is placed between two two-way switches.
It uses four wires.
It is useful in long corridors, communal areas or installations with multiple access points.
What is a two-wire switch for?
The two-wire switch is used when a single light needs to be controlled from one point only. It is the most practical, affordable and straightforward solution for:
Single-entrance bedrooms.
Small bathrooms.
Compact kitchens.
Storage rooms, garages or auxiliary spaces.
Decorative or accent lighting.
In short, it is used when two-way switching is not needed. Its simplicity not only makes installation easier, but also reduces the risk of mistakes and minimises maintenance.
What do you need to wire a switch with two cables?
To install it safely and professionally, you will need:
A one-way switch compatible with two wires.
Screwdriver suited to the model.
Wire strippers.
Voltage tester pen to identify the live wire.
Insulated gloves.
Insulating tape (optional but recommended).
And, of course, the most important thing: turn off the mains power at the consumer unit before handling any wires.
Basic two-wire wiring diagram
The one-way switch works on a very simple principle: it interrupts or allows the current to flow through to the lamp. That is why you only need two cables:
Incoming live (L): comes in from the installation.
Outgoing live: it goes to the lamp.
The neutral does not pass through the switch: it goes directly to the light point.
The conceptual diagram would be:
Phase switch → lamp → neutral
This system is the basis of the entire process.
Step by step: how to wire a switch with two cables
Let's now move on to the practical procedure. This is the key section to really understand how to wire a switch with two cables safely and effectively.
1. Turn off the power
Switch off the main breaker at the consumer unit. For extra safety, cut the electricity as well.
Check with a voltage tester that there is no voltage on the wires.
This step is non-negotiable.
2. Remove the old mechanism
Remove the trim.
Loosen the mechanism's screws.
Take the switch out of the back box.
Identify the two connected wires.
In older installations, a blue wire may be used as the live. This is not ideal, but the procedure is the same.
3. Identify the incoming live
If you remember which cable came from the installation and which went to the lamp, perfect. If not, do not worry: in a one-way switch, the order does not matter, although it is advisable to place the incoming live on terminal L.
4. Prepare the cables
Make sure the ends have between 8 and 10 mm of exposed copper.
If not, strip them carefully.
5. Connect the wires to the switch
Insert the incoming live into the L terminal.
Insert the outgoing live into the terminal marked with an arrow or an output symbol.
Tighten the screws firmly to prevent loose contacts.
6. Fit the mechanism into the back box
Insert the switch into the flush-mounted back box.
Avoid bending the wires excessively.
Screw in the mechanism.
Fit the faceplate.
7. Restore the power
Switch the main breaker back on at the consumer unit and test that it works.
How to test whether the switch is working properly
Once assembled:
Toggle the switch.
The light should turn on and off without flickering.
If it does not work, check:
That the wires are firmly secured.
That the live wire is in the correct terminal.
That the bulb has not blown.
If the breaker trips, there is probably a short circuit caused by a bare wire or a loose connection.
Common mistakes when wiring with two cables
Although it is a simple installation, there are some typical mistakes:
Confusing a one-way switch with a two-way switch
If it has three terminals, it is not a one-way switch.
Not turning off the power
The most dangerous mistake.
Putting the neutral through the switch
It should never pass through the mechanism.
Tightening the screws only lightly
This can cause sparks or flickering.
Using cables that are too short
This makes assembly harder and can create strain.
Fitting the switch upside down
Even if it works, it is not recommended.
Alternatives: when to use a double switch or a two-way switch?
Although knowing how to wire a switch with two cables is useful, it is not always the best option.
Double switch
Controls two independent lights from the same point.
Ideal for:
Bathrooms with light and extractor fan.
Living rooms with two lighting zones.
Kitchens with general lighting and worktop lighting.
Two-way switch
It lets you control one light from two locations.
Perfect for:
Long corridors.
Bedrooms with a switch at the entrance and another next to the bed.
Staircases.
Intermediate switch
For three or more control points.
Useful in:
Wide corridors.
Communal areas.
Rooms with multiple access points.
Mastering the simple to control the essential: the approach that defines Simon mechanisms
Learning how to wire a switch with two cables not only lets you carry out small repairs or replacements at home, but also opens the door to understanding the logic of electrical installations and to overcoming the fear of working on them safely. Simplicity, when properly understood, becomes a powerful tool.
This type of switch remains the most widely used mechanism in homes thanks to its efficiency, low cost and ease of installation. However, knowing the alternatives, such as two-way or double switches, always lets you choose the most suitable solution for each space.
When it comes to one-way switches, two-way switches or intermediate switch mechanisms, it is impossible not to take Simon as a reference. Its ranges, such as Simon 27, Simon 82 or Simon 100, are common in homes and refurbishments thanks to their durability, ease of installation and compatibility with different types of mechanisms.
In the specific case of wiring a switch with two cables, Simon mechanisms generally feature a very intuitive design:
The L terminal is clearly identified.
The output terminal is usually marked with an arrow or an unambiguous symbol.
The cable fixing system is firm and accessible, which makes it easy to install even in older flush-mounted back boxes.
In addition, Simon maintains design consistency across switches, sockets and other mechanisms, allowing the installer, or the user themselves, to replace a single switch with another from the same range without having to change the back box or the frame. This compatibility is particularly useful during partial refurbishments or in homes where the original look must be preserved.